How to Rebuild a Jet Pump: Step-by-Step Guide With Parts List
Share
How to Rebuild a Jet Pump: Step-by-Step Guide With Parts List
If your jet ski is losing power, cavitating, or sounding like it's chewing gravel, it's time to learn how to rebuild a jet pump. The good news: this is a job you can do in your driveway with basic tools, the right parts, and a few hours on a Saturday. This guide walks through the full teardown-to-reassembly process for Sea-Doo, Yamaha, and Kawasaki PWC — no shop required.
This is the procedure. If you're still deciding whether to do it at all, our Sea-Doo jet pump rebuild guide covering what's included and what it costs breaks down the money side first.
When Does a Jet Pump Need to Be Rebuilt?
Not every pump problem requires a full rebuild, but these symptoms mean you're past the point of simple maintenance:
- Loss of top-end speed or sluggish acceleration — the most common sign of a worn impeller or degraded wear ring clearance
- Vibration at speed — usually a nicked or bent impeller blade throwing the rotor out of balance
- Audible grinding or rattling — a failed pump bearing or debris impact damage
- Cavitation at full throttle — the pump is pulling air instead of water because wear ring clearance has opened up
- Water in the hull — on Sea-Doo, a failed carbon seal at the driveshaft, often caused by the pump bearings themselves
- Sand or grit intrusion — a single beaching incident can sand-blast both the impeller and wear ring in minutes
If you're seeing two or more of these together, a full rebuild is the right call. Chasing individual symptoms one at a time costs more in parts and labor than doing it right once. Not sure yet? Work through how to tell if your Sea-Doo jet pump is bad first.
What's Inside a Jet Pump
Before you tear into it, know what you're working with. A jet pump is simple by design:
- Impeller — the spinning rotor that accelerates water through the pump. Highest-wear component in the system.
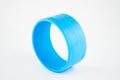
- Wear ring (liner) — the stationary housing around the impeller. The clearance between these two parts determines your pump efficiency. More than 1mm of play and you're leaving serious thrust on the table.
- Drive shaft — connects the engine to the impeller. Inspect for straightness and spline wear at both ends.
- Pump bearing and mechanical seal — keep water out of the hull and the shaft running true. These fail together.
- Stator — fixed vanes behind the impeller that straighten water flow and convert rotational energy into forward thrust.
- Pump housing and intake grate — the outer body and the grate that keeps debris from shredding your impeller.
The wear ring is what decides whether a rebuild is worth doing at all — we stock PWC wear rings alongside jet pump repair kits that put the bearings, seals, and o-rings in one box. For a deeper look at diagnosing the ring itself, see Sea-Doo wear ring symptoms.
How to Rebuild a Jet Pump: Step-by-Step
Step 1: Remove the Jet Pump
Work with the ski on a trailer or stand with the rear accessible.
- Disconnect the steering cable and throttle/reverse linkage from the pump nozzle
- Remove the intake grate (typically 4–6 bolts depending on model)
- Disconnect the driveshaft coupler — most platforms use a splined shaft that slides free once you remove the coupler bolt or retaining nut
- Remove the pump housing bolts attaching the pump to the hull (usually 6–8 bolts)
- Slide the pump straight back off the shaft and out
Keep a rag at the driveshaft tunnel opening — water trapped in the bilge will drain when the pump breaks free.
Step 2: Disassemble the Pump
With the pump on the bench:
- Remove the nozzle and reverse bucket if equipped
- Use a spanner wrench to remove the impeller — thread direction matters. Sea-Doo impellers are reverse-threaded (lefty tighty, righty loosey). Yamaha and Kawasaki are standard right-hand thread. Confirm before you apply torque or you'll wreck the impeller threads.
- Remove the stator — retained by a snap ring or bolts depending on model
- Press or tap the wear ring out of the pump housing
- Remove the pump bearing and mechanical seal from the rear of the housing
Model-specific impeller removal walkthroughs: Sea-Doo and Yamaha WaveRunner.
Step 3: Inspect Everything Before Ordering Parts
Don't just replace what's visibly broken. Take five minutes to inspect:
- Impeller blades: nicks, chips, or cavitation pitting? A bent blade kills balance and accelerates future wear.
- Drive shaft: roll it across a flat surface — any visible wobble means it's bent and needs replacement before you reassemble anything
- Stator vanes: cracks or broken vanes reduce thrust and cause vibration at speed
- Pump housing bore: sand erosion or impact damage that would compromise the new wear ring seat
Step 4: How to Rebuild a Jet Pump — Your Parts List
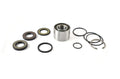
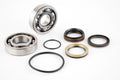
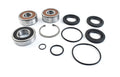
Here's what a complete rebuild requires:
| Part | Notes |
|---|---|
| Wear ring | Match to your exact model and year — don't guess on fit |
| Impeller | Replace if damaged; a SOLAS upgrade is worth it if you want performance back |
| Pump bearing | Replace every time the pump is fully disassembled — cheap insurance |
| Mechanical seal | Always pair with the bearing — they fail together |
| O-rings and gaskets | Get a full seal kit for your model; never reuse old o-rings |
| Coupler (if worn) | Check spline engagement — a sloppy coupler will kill your new rebuild |
If the blades are chipped, rolled, or sanded down past their profile, replace rather than repair. Our SOLAS impellers cover Sea-Doo, Yamaha, and Kawasaki, and a fresh impeller paired with a new wear ring is what actually restores the clearance the pump depends on.
For a stock restore, OEM-spec parts are the conservative choice. If you want to recover lost performance — or actually improve on stock — a SOLAS impeller is the upgrade. They're machined to tighter tolerances and offer multiple pitch options to match your riding style. Worth reading first: SOLAS vs. stock impeller — is the upgrade worth it?
Step 5: Install the New Wear Ring
The wear ring is a press fit into the pump housing bore. Two reliable methods:
- Thermal fit: Freeze the new wear ring for 30 minutes and warm the housing gently with a heat gun. The differential contraction and expansion lets it slide in cleanly with light pressure.
- Mechanical press: Use a section of PVC pipe cut to match the ring OD and tap it evenly around the perimeter with a rubber mallet.
Never hammer directly on the ring face — you'll deform it and blow your impeller clearance before the ski ever hits water.
Step 6: Install the Bearing and Mechanical Seal
Press the new bearing into the housing to the correct seating depth for your model. The mechanical seal installs face-side toward the impeller. Apply a small amount of clean water or petroleum jelly to the rubber contact faces to ease installation — keep grease away from the sealing faces.
On Sea-Doo, this is also when you address the carbon seal at the driveshaft. Replacing it without fixing what killed it is how people end up doing this job twice — see water in your Sea-Doo hull and what killed the carbon seal.
Step 7: Reassemble the Pump
Reassembly is reverse order:
- Install the stator and secure with the snap ring or bolts — torque to spec
- Thread the impeller on hand-tight, then torque to spec (typically 70–100 ft-lbs; confirm in your model-specific service manual)
- Reinstall the nozzle and any reverse linkage
- Replace the O-ring at the pump-to-hull mating surface — this seal prevents ingestion of air and hull leaks
- Slide the pump onto the driveshaft, engage the coupler, and torque the housing bolts in a cross pattern to prevent distortion
Step 8: Reinstall and Test
Connect all steering and throttle linkages. Test the pump using a flush adapter and garden hose or in a test tank before your first ride. Check for:
- No water intrusion past the mechanical seal at the driveshaft
- Smooth, vibration-free operation across the throttle range
- Full steering deflection with the nozzle responding correctly
If you have a diagnostic tool, log peak RPM before and after. A worn pump that was holding the engine back will show a clear improvement once clearances are restored.
If RPM still runs high after the rebuild, look upstream at the driveline — worn splines or a tired coupler from our drive system parts will mimic a worn pump and undo the work you just did. Misaligned motor mounts do the same thing.
How Long Does a Jet Pump Rebuild Take?
For a first-timer working carefully with a service manual, budget 3–5 hours. Once you know the platform, a full rebuild drops to 90 minutes. The learning curve is the removal — the actual component work is fast.
FAQ
How much does it cost to rebuild a jet pump?
Parts for a complete rebuild — impeller, wear ring, bearing, seal, and o-ring kit — typically run $150–$400 depending on brand and whether you go OEM or aftermarket. A shop charges another $200–$400 in labor on top of that. Doing it yourself keeps that money in your pocket. Full breakdown: what's included in a Sea-Doo pump rebuild and what it costs.
How do I know if my wear ring needs replacement?
With the pump removed, try to move the impeller side to side inside the housing. Any gap you can measure over 1mm with a feeler gauge means the ring is worn past spec. On the water, the symptom is reduced top speed with no other obvious cause — the engine revs freely but thrust falls short.
Can I rebuild a jet pump without special tools?
Mostly yes. A spanner wrench is the one tool you genuinely need — improvising for impeller removal risks threading damage that turns a $200 job into a $600 one. Most everything else is handled with common hand tools, a rubber mallet, and either a bearing press or the freeze-and-heat method for the wear ring.
How often should a jet pump be rebuilt?
There is no fixed interval. Inspect impeller condition and wear ring clearance every 100 hours or at the start of each season. Rebuild when wear dictates, not on a calendar — a ski that only runs in clean, sandy-free water can go years between rebuilds. One trip across a sandbar can change that math overnight.
Related Jet Pump Guides
- How to tell if your Sea-Doo jet pump is bad: 6 warning signs
- Sea-Doo wear ring symptoms: how to tell if yours is bad
- Growling noise from the back? It's probably your jet pump bearings
- Revs fine but lost top speed? It's almost always the wear ring
- Jet ski vibration when accelerating: causes, diagnosis, and fixes
- How to replace a Sea-Doo impeller (step-by-step)
- Yamaha WaveRunner impeller replacement
- SOLAS vs. stock impeller: is the upgrade worth it?
- Water in your Sea-Doo hull? It's usually the carbon seal
- Jet ski won't go full speed? How to diagnose the problem
Get Your Jet Pump Rebuild Parts
Everything you need to do this job right — wear rings, SOLAS impellers, bearing and seal kits, model-specific O-ring sets — is in stock at Everything Jetski. Search by brand and model to get exact-fit parts for your ski, skip the guesswork, and get back on the water.