Sea-Doo Motor Mounts: How to Tell If They're Bad — and Replace & Align Them Right
Share
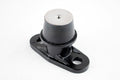
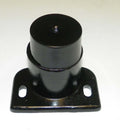
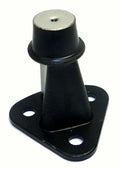
Your Sea-Doo's motor mounts do two jobs: they soak up engine vibration, and — just as important — they hold the engine in perfect line with the driveshaft and pump. When a mount cracks, sags, or gets oil-soaked, the engine starts to move. That shows up as vibration and clunks, but the real damage is quieter: a shifting engine chews up your carbon seal and driveshaft splines, which is how a $60 mount turns into water in the hull. Here's how to check them, replace them, and — the step everyone skips — align the engine so it stays fixed.
Signs your motor mounts are going
- New vibration, especially at idle or when you roll on and off the throttle.
- A clunk, knock, or thud that comes and goes when you accelerate or decelerate — the engine tapping against something as it shifts.
- Visible engine movement when you blip the throttle (have a helper watch while you rev it).
- Uneven carbon seal wear or repeat carbon seal failures / water in the hull — the classic downstream symptom of a misaligned engine.
- Cavitation or worn driveshaft splines from the shaft running off-center.
How to check engine movement (the 2-minute test)
On the trailer, engine off, seat and any covers off so you can reach the engine:
- Look first. Inspect each rubber mount for cracks, tears, a collapsed/squashed look, separation of the rubber from its metal plate, or rubber that's gone soft and oily (an oil leak will rot a mount fast). A sagging or split mount is a confirmed replacement.
- Grab and lift. Take hold of the engine by the exhaust manifold and give it a firm lift and push — up, down, and side to side. Then do the same on the intake manifold side. You're feeling for the engine to lift, rock, or clunk on its mounts. A little give through the rubber is normal; noticeable movement, a clunk, or one side lifting more than the other means a mount is shot. (As a rule of thumb, more than about a half-inch of movement is too much.)
- Watch it run. Have a helper bump the throttle while you watch the engine — if it jumps or twists visibly, the mounts aren't holding it.
How to replace the motor mounts
Sea-Doos typically use separate front and rear mounts, and they wear at different rates — inspect both. Work safely: battery disconnected, ski level on the trailer.
- Support the engine. Take the weight off the mount you're replacing with a strap or a block so nothing drops.
- Unbolt the mount from both the engine and the hull bedplate. Note any alignment shims under the mount and keep them with their locations — they're part of your alignment.
- Swap in the new mount but leave the bolts loose for now. This is key — you set alignment before you torque anything down.
- Repeat for the other mount if needed, then move to alignment below before final torque.
The step everyone skips: align the engine
Here's the whole reason this matters. The engine has to line up with the driveshaft and pump within a hair, or the shaft runs off-center and destroys the carbon seal and splines. Every time the engine moves — even just replacing mounts — the alignment can change. Don't close it up without checking.
Option A — the alignment tool (do it right)
A driveshaft alignment tool is the proper way and takes the guesswork out. You pull the driveshaft and seal boot, mount the support plate on the pump shoe, put the adapter in the crankshaft end, and slide the alignment rod through the driveshaft tube to confirm it lines up dead center. Shim and nudge the engine until the rod seats perfectly, then torque the mounts.
Shop the tool for your ski: Sea-Doo 4-TEC alignment tool (02–09) · complete driveshaft alignment tool kit · 2-stroke 580–951 adapter.
Option B — the DIY rod method
No tool? Pull the driveshaft and seal boot, then slide a straight steel rod through the driveshaft tube into the PTO/crank splines. If the rod slips in snug and looks centered in every direction, your height and side-to-side are close. Tighten the mount bolts and check again — if it shifts off-center, shim or nudge the engine until it stays centered with the bolts torqued.
Option C — the self-align trick
With the mounts left loose, reinstall the driveshaft and briefly bump the starter — the spinning shaft lets the engine settle into its natural center. Then torque the mounts down. Sea-Doo's crowned driveshaft splines give a little tolerance, and the rubber bumpers on each end of the shaft help, but don't lean on that to cover a sloppy alignment.
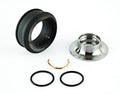
Whichever method you use: torque the mount bolts to spec, reinstall the driveshaft with a fresh carbon seal, and recheck. If you replaced mounts because your carbon seal was chewed, put a new seal in now — the old one wore to the bad alignment.
The honest part
Replacing motor mounts without re-aligning the engine is how people end up back in the hull a month later with a leaking carbon seal. The mounts are the easy part; the alignment is the part that makes it last. Do both together and you fix the vibration and protect the driveline.
Get the parts for your ski
Match to your exact year and model — Sea-Doo uses different front and rear mounts:
Common Sea-Doo mounts: 4-TEC 1503/1630 02–17 · 4-TEC front mount 09–17 · 800/951 2-stroke 96–06.
Related guides
Applies to Sea-Doo 2-stroke and 4-TEC skis. Take engine and driveline alignment seriously — it's what protects your carbon seal, driveshaft, and pump.